
The setup
Zig is a programming language that I have being exploring. There is a lot of nice features with in the language, but today I want to talk about the build system and how we can do multi builds. The Zig build system is extremely powerfully, and allows cross compilation. So if we want to release the our application on multiply targets we need a set of tools to generate the binaries for the targets, and includes some resource files.
There is a number of ways we could think of doing this. Most people I know would reach for a Make target, or a bash script. We do not have to do any of this in Zig. By the end of this post to build the project across multiply targets we will be able to run the command zig build release. This will generate all our resources.
As Zig is pre V1 this example was tested using zig 0.16.0, and 0.17.0. It may not work with older, or newer version. You have being warned.
Simple project
Lets create a very simple Zig project. Navigate to a working directory that you are happy to make projects in. Then create a directory and initialize a minimal zig project.
mkdir project
cd project
zig init -m
This will add two files to our directory, build.zigand build.zig.zon. We will spend our time inside the build.zig but first we will need to create a basic application for use to ship.
mkdir src
touch main.zig
Now in src/main.zig we add the following.
/// src/main.zig
const std = @import ("std");

pub fn main() void {
    std.debug.print("hello world\n", .{});
}
We test our application runs with zig run src/main.zig. Doing this will will not give us a binary that we can share.
Basic build command
With the our basic application we now update the build.zigto build, and save our application to zig-out/bin, which is the default directory. We will take the name of the application from the build.zig.zon file using the @tagName(zon.name). This name by default is set to the name of the directory zig init was ran inside of.
/// build.zig
const std = @import("std");
const zon = @import("build.zig.zon");

pub fn build(b: *std.Build) void {
    const exe = b.addExecutable(.{
         .name = @tagName(zon.name),
         .root_module = b.createModule(.{
             .root_source_file = b.path("src/main.zig"),
             .target = b.standardTargetOptions(.{}),
             .optimize = b.standardOptimizeOption(.{}),
         }),
    });

    b.installArtifact(exe);
}
Now with that code saved we can create a build.
$ zig build
$ tree zig-out
zig-out/
└── bin
    └── project

$ ./zig-out/bin/project
hello world
This seems like we are a long way away from the multi build that I mentioned at the start. Maybe, but I would also like to point out if you run zig init without the -m you get a version of the set up created for you. It includes other setup configuration, like sample tests, including other modules and such. That is more than what we need for this simple example.
Starting the multi builds
What we are including and targeting
It is about time we started with doing the multi builds. The first step is to add the step to the build system inside the build function.
/// build.zig

pub fn build(b: *std.Build) void {
    ....
    ....

    // Multi Build System
    const release_step = b.step("release", "Build release archives");

}
This adds release as a sub command to the zig build. Command will be listed in the help of for the build also. But not yet as we currently do not compile as the release_step const is not used anywhere.
Next step is to add our build targets. To make this easier we are also going to create a new struct at the bottom of the build file.
/// build.zig

...

const ReleaseTarget = struct {
    os_tag: std.Target.Os.Tag,
    arch: std.Target.Cpu.Arch,
    os_name: []const u8,
    arch_name: []const u8,
};
If you have never seen Zig before, the []const u8 is how you define a "string type". Inside the build function we will define a list of release targets.
/// build.zig

    ...

    // Multi Build System
    ...

    const release_targets = [_]ReleaseTarget{
        .{ .os_tag = .linux, .arch = .x86_64, .os_name = "linux", .arch_name = "amd64" },
        .{ .os_tag = .linux, .arch = .aarch64, .os_name = "linux", .arch_name = "arm64" },
        .{ .os_tag = .macos, .arch = .x86_64, .os_name = "darwin", .arch_name = "amd64" },
        .{ .os_tag = .macos, .arch = .aarch64, .os_name = "darwin", .arch_name = "arm64" },
     };
Next we will define a list of files we wish to bundle in our archive. For this we also create a helper struct. But we also need to create the file(s) that we want to include.
On the command line run touch README.md to create a blank readme file. Right now we don't care about the contains, it is for an example. With that done lets create the helper struct and list of files to include.
/// build.zig

    // Multi Build System
    ...
    const release_files = [_]ReleaseFile{
        .{ .src = ".", .name = "README.md" },
    };
}

const ReleaseTarget = struct {
...

const ReleaseFile = struct {
   src: []const u8,
   name: []const u8,
};
Processing the release targets
This is last step. We are going to make a small edit to the build function and then we are going to create a new function. Lets edit the the build function first.
/// build.zig

    // Mutli Build System
    ...

    for (release_targets) |release_target| {
       const step = process_target(b, release_target, &release_files);
       release_step.dependOn(step);
    }
In the above code the interesting part is the release_step.dependOn(step)This ensures that we call the zig build release command the contents of the step will be included and that code needs to run first. So now lets define the process_target function. This will be at the end of the build.zig file.
/// build.zig
...

fn process_target(b: *std.Build, target: ReleaseTarget, files: []const ReleaseFile) *std.Build.Step {
   const group_step = b.step(
       b.fmt("package_{s}-{s}", .{ target.os_name, target.arch_name }),
       "creates archive for build target",
   );

   const exe = b.addExecutable(.{
       .name = @tagName(zon.name),
       .root_module = b.createModule(.{
           .root_source_file = b.path("src/main.zig"),
           .target = b.resolveTargetQuery(.{ .cpu_arch = target.arch, .os_tag = target.os_tag }),
           .optimize = .ReleaseSmall,
       }),
   });

   const root = "zig-out/dist";
   std.Io.Dir.cwd().createDirPath(b.graph.io, root) catch unreachable;
   const archive = b.fmt("{s}/{s}-{s}-{s}.tar", .{ root, @tagName(zon.name), target.os_name, target.arch_name});

   const tar_setup = b.addSystemCommand(&.{ "tar", "-cf" });
   tar_setup.addArg(archive);
   tar_setup.addArg("--files-from=/dev/null");
   tar_setup.setName("create empty archive");

   const tar_exe_file = b.addSystemCommand(&.{ "tar", "-rf", archive, "-C" });
   tar_exe_file.addFileArg(exe.getEmittedBinDirectory());
   tar_exe_file.addArg(exe.name);
   tar_exe_file.setName(b.fmt("add binary {s}", .{exe.name}));
   tar_exe_file.step.dependOn(&tar_setup.step);

   const gzip_exe = b.addSystemCommand(&.{ "gzip", "-f", archive });
   gzip_exe.step.dependOn(&tar_exe_file.step);

   for (files) |file| {
       const tar_file_include = b.addSystemCommand(&.{ "tar", "-rf", archive, "-C", file.src, file.name });
       tar_file_include.step.dependOn(&tar_setup.step);
       gzip_exe.step.dependOn(&tar_file_include.step);
   }

   group_step.dependOn(&gzip_exe.step);
   return group_step;
}
So that is a lot more code that maybe expected. It is however doing a lot of repeated formulas, but lets break it down.
In the start we define the step that will collect all the actions. This will be returned at the functions end.
   const group_step = b.step(
       b.fmt("package_{s}-{s}", .{ target.os_name, target.arch_name }),
       "creates archive for the build target",
   );
Next we define how the binary is going to be build. This is very similar to the other build definition that we had done earlier in the file. The main changes are in the .target and .optimize these have being adjusted for build target, and doing a release build not a debug build.
    const exe = b.addExecutable(.{
        .name = @tagName(zon.name),
        .root_module = b.createModule(.{
            .root_source_file = b.path("src/main.zig"),
            .target = b.resolveTargetQuery(.{ .cpu_arch = target.arch, .os_tag = target.os_tag }),
            .optimize = .ReleaseSmall,
        }),
    });
Next we define where the root directory to save the archives to, creating the directory if it doesn't exist. Then we define the name the archive will be called which includes the root path. We will be compressing it later so for now the acrhive ends wit .tar.
    const root = "zig-out/dist";
    std.Io.Dir.cwd().createDirPath(b.graph.io, root) catch unreachable;
    const archive = b.fmt("{s}/{s}-{s}-{s}.tar", .{ root, @tagName(zon.name), target.os_name, target.arch_name });
As we are going to be adding files from different locations to the archive we first create an empty archive. This is where the formulas start to repeat. First we define the system command that is going to run using b.addSystemCommand. In this example the we are use the systems tar. It is possible for zig to manage the tools the project requires, but that is out of scope for this here. Then we are going to add some arguments to the command with addArg. In this case we add our archive name and that we want the files from /dev/nul.
    const tar_setup = b.addSystemCommand(&.{ "tar", "-cf" });
    tar_setup.addArg(archive);
    tar_setup.addArg("--files-from=/dev/null");
Then we add the binary to archive. This we use tar again, however we also add the directory location of the built binary using addFileArg and the name of the file we are using from that directory with the addArg. Then we are saying the adding of the binary to the archive depends on the tar_setup by using step.dependOn. This means if there is any errors in tar_setup build system will not try run this step.
    const tar_exe_file = b.addSystemCommand(&.{ "tar", "-rf", archive, "-C" });
    tar_exe_file.addFileArg(exe.getEmittedBinDirectory());
    tar_exe_file.addArg(exe.name);
    tar_exe_file.step.dependOn(&tar_setup.step);
Next block we say that we want to gzip the archive. This also depends on the last step being completed successfully.
    const gzip_exe = b.addSystemCommand(&.{ "gzip", "-f", archive });
    gzip_exe.step.dependOn(&tar_exe_file.step);
Are you starting to see the pattern, you define a step and state what it depends on. The next block is doing the very same, but this time we are looping over the list of files, and we are also say the gzip_exe depends on the steps created within the loop.
    for (files) |file| {
        const tar_file_include = b.addSystemCommand(&.{ "tar", "-rf", archive, "-C", file.src, file.name });
        tar_file_include.setName(b.fmt("adding {s}", .{file.name});
        tar_file_include.step.dependOn(&tar_setup.step);
        gzip_exe.step.dependOn(&tar_file_include.step);
    }
Finally we say the group_step depends on the gzip_exe before we return it out of the function.
    group_step.dependOn(&gzip_exe.step);
    return group_step;
It would be wrong to say that is all there is to it as there is a lot going on here. But that is all there is to it. Now we can run our release function and see it build for the different platforms. So when the build completes successfully we can see what happened the --summary all can also be passed. In the explain of the different code blocks I didn't mean the setName() what was called on all the tar commands. This was done to give better feed back in the summary graph. Without setting the names the steps would show as run tar.
$ zig build release --summary all
Build Summary: 25/25 steps succeeded
release success
├─ package_linux-amd64 success
│  └─ run gzip success 4ms
│     ├─ add binary project success 2ms
│     │  ├─ compile exe project ReleaseSmall x86_64-linux cached 6ms MaxRSS:41M
│     │  └─ create empty archive success 1ms
│     └─ adding README.md success 2ms
│        └─ create empty archive (reused)
├─ package_linux-arm64 success
│  └─ run gzip success 5ms
│     ├─ add binary project success 2ms
│     │  ├─ compile exe project ReleaseSmall aarch64-linux cached 6ms MaxRSS:41M
│     │  └─ create empty archive success 1ms
│     └─ adding README.md success 2ms
│        └─ create empty archive (reused)
├─ package_darwin-amd64 success
│  └─ run gzip success 3ms
│     ├─ add binary project success 2ms
│     │  ├─ compile exe project ReleaseSmall x86_64-macos cached 6ms MaxRSS:41M
│     │  └─ create empty archive success 2ms
│     └─ adding README.md success 5ms
│        └─ create empty archive (reused)
└─ package_darwin-arm64 success
   └─ run gzip success 4ms
      ├─ add binary project success 2ms
      │  ├─ compile exe project ReleaseSmall aarch64-macos cached 5ms MaxRSS:41M
      │  └─ create empty archive success 981us
      └─ adding README.md success 1ms
         └─ create empty archive (reused)

$ tree zig-out/
zig-out/
└── dist
    ├── project-darwin-amd64.tar.gz
    ├── project-darwin-arm64.tar.gz
    ├── project-linux-amd64.tar.gz
    └── project-linux-arm64.tar.gz
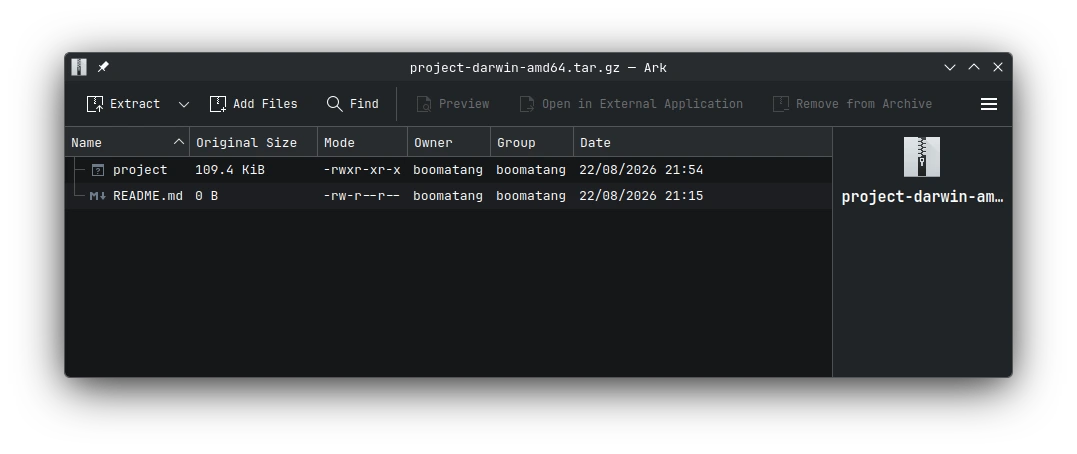
And looking inside of one of the archives we can see that there is the binary and the readme file.
Wrapping Up
I feel that this approach to build systems is very interesting. The system is very extendable, and can do far more than was shown here. Third party tool management is one such thing, hopefully I will put together a post with examples of that. Yes, every thing we done here could have being done in a few lines bash scripts or Make targets, but this just has a cleaner feel to it.
There is also the other side that makes this a very nice approach, and that is the error tracing when something fails. It is hard to add in a step that can silently fail because we forgot to add error checking. Don't know how many times that has happened in other systems. And if you look at the out put from build using --summary all you get to see the time taken for each step. A number of times I have found my self adding timing block to bash scripts to find why it was taken so long.
Zig as a language is really interesting on its own, but its build system just adds to its power. Given the language is not even v1 I am looking forward to seen where the language goes in the next few years.